How to Integrate UPI Payment Gateway in a Website
Learn how to integrate a UPI Payment Gateway in your website using Dynamic UPI QR, UPI Intent, APIs and automated payment verification.
How to Integrate UPI Payment Gateway in a Website
If you run an online business, you already know one thing: making the payment process easy can directly affect your sales. A customer may like your product, add it to the cart and reach checkout, but if the payment experience feels confusing or slow, they can simply leave. This is one of the main reasons businesses in India are looking at UPI payment integration for websites. UPI has become a familiar payment method for millions of users, and the scale is still growing. According to the latest NPCI statistics, UPI processed 24,508.96 million transactions in August 2026, with a transaction value of about ₹29.82 lakh crore.
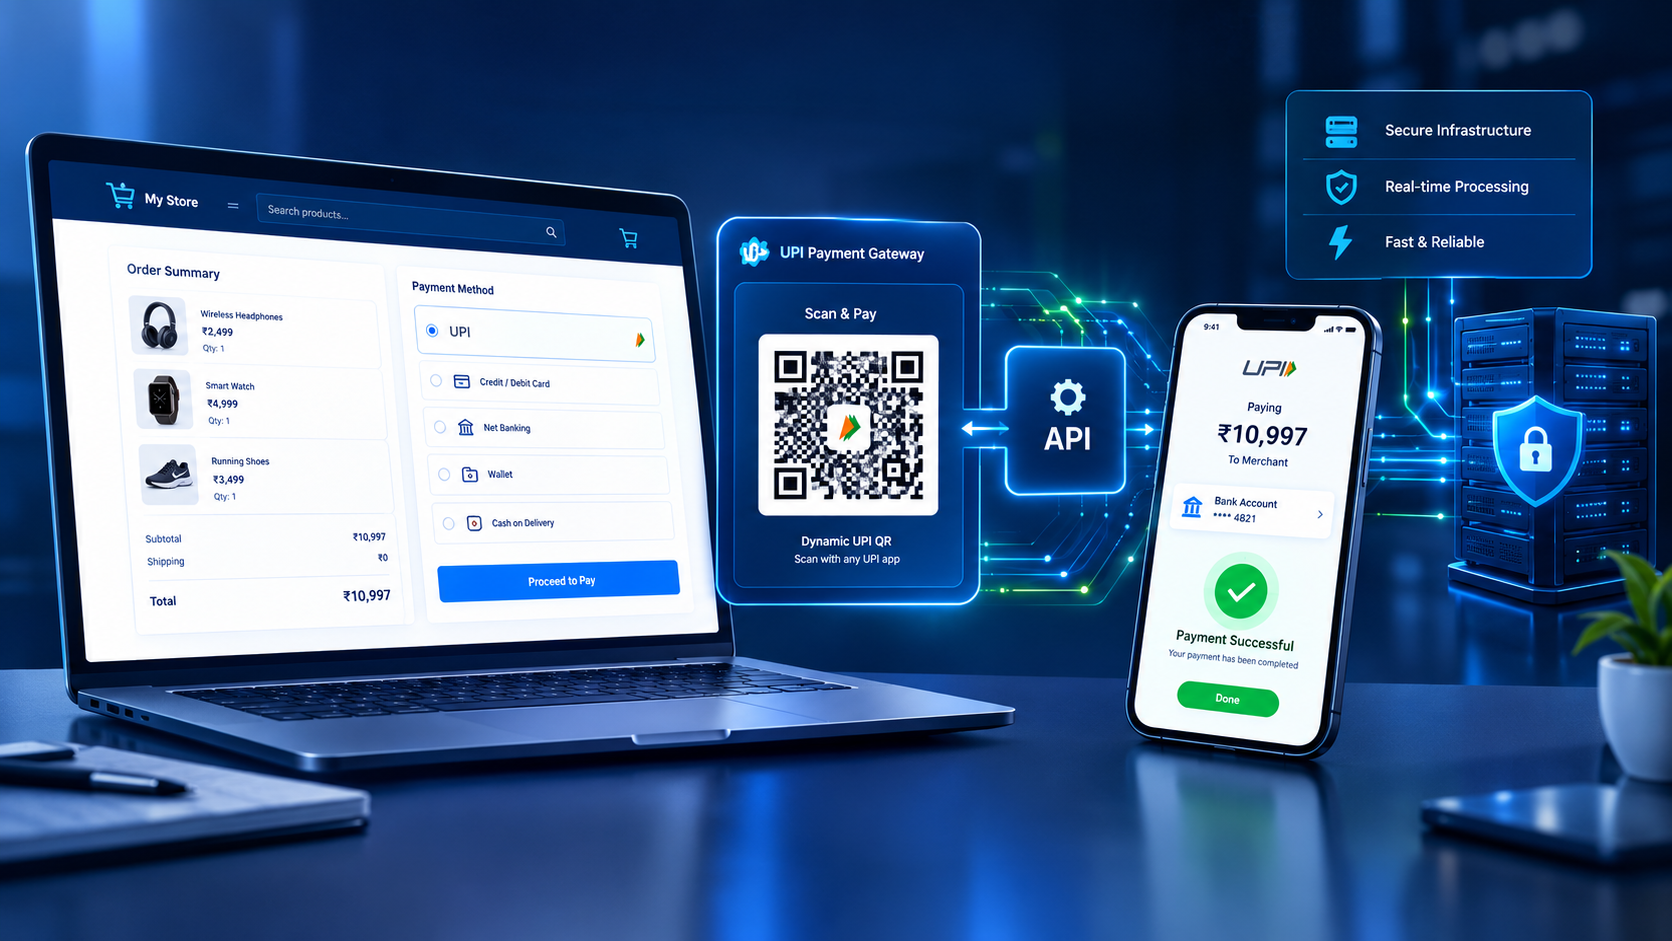
For a website owner, integrating UPI does not necessarily mean building an entire payment system from zero. A UPI Payment Gateway can provide the technology layer required to create payment requests, display dynamic QR codes, support UPI Intent where available, receive payment status updates and connect successful payments with your website's order system. The exact integration method depends on the provider, your merchant setup and the type of website you operate. NPCI itself describes merchant UPI integration through modes such as QR, Intent, application-based and Collect integrations.
In this guide, we will walk through how to integrate a UPI Payment Gateway in a website, what you need before starting, how API-based payment processing works, how payment verification should be handled, and what you should check before selecting a provider such as UPI-Gateway.in. The aim is not simply to add a payment button. The real goal is to build a checkout process that is practical, secure, trackable and easy for customers to use.
Why UPI Payment Integration Matters for Websites
Imagine a customer visiting your website from a mobile phone. They select a product, enter their details and click "Pay Now". At this point, every extra step creates another opportunity for the customer to drop off. If the checkout immediately offers a familiar UPI payment option, the journey can feel much more natural.
That is why UPI Payment Integration has become an important consideration for Indian e-commerce stores, SaaS businesses, service providers, educational platforms, subscription businesses and mobile-first websites. UPI can support payment experiences based around QR codes and payment intents, while the gateway or integration layer can connect those payment events to the merchant's website. The exact customer experience will depend on the gateway and acquiring arrangement, so businesses should not assume that every UPI provider offers identical functionality.
The Growth of UPI Payments in India
The numbers explain why website owners continue to pay attention to UPI. NPCI's current statistics show that monthly UPI transaction volume reached more than 24.5 billion transactions in August 2026. The same month recorded transaction value of roughly ₹29.82 lakh crore, demonstrating how deeply UPI is integrated into India's digital payment environment.
This doesn't mean every website should blindly replace every payment option with UPI. Different customers prefer different methods. But if your main market is India, ignoring UPI can mean ignoring a payment method that many customers already understand. For a business selling online, the smarter approach is to make UPI easy to access while keeping the overall checkout experience simple.
What a UPI Payment Gateway Actually Does
A UPI Gateway is essentially the technology layer that helps a business initiate and manage UPI-based payment transactions through its website or application. Depending on the provider's architecture, it can generate a payment request, create a dynamic UPI QR, provide a UPI Intent option, return transaction information through an API and send payment notifications through webhooks.
The important point is that a gateway is not simply a QR image placed on a webpage. A proper website integration needs a way to connect the customer's payment with a specific order. For example, if a customer purchases an ₹899 product, your system should know that the payment request belongs to order #1045 and should only mark that order as paid after the payment has been appropriately verified.
What You Need Before Integrating a UPI Gateway
Before writing code, get the basic business and technical pieces ready. This step sounds boring, but it can save a lot of development time later. You generally need a legitimate business or merchant setup accepted by the relevant payment provider, a website with a working checkout flow, server-side functionality for API requests, and a secure HTTPS connection.
You should also decide how you want customers to pay. A Dynamic UPI QR is useful when the amount and order information need to be associated with a particular transaction. UPI Intent can provide a more direct mobile payment experience when supported by the relevant integration. For developers, APIs and webhooks are particularly important because they allow the website's backend to communicate with the payment system instead of relying on screenshots or manual checking.
Merchant Account and UPI Setup
A merchant should not assume that any personal UPI ID can automatically be converted into a full payment gateway. NPCI's merchant FAQ states that merchants looking to accept UPI need to partner with an acquiring bank, with the acquiring bank providing the UPI infrastructure. NPCI also notes that merchant onboarding can involve compliance and risk assessment, merchant identification and configuration such as MCC and UPI ID.
The exact onboarding requirements depend on the provider and business model. Therefore, before choosing an integration method, check what merchant documents, KYC information, bank details and technical requirements your selected provider requires.
Website, SSL and Technical Requirements
Your website should use HTTPS, particularly around login, checkout and payment-related pages. Your backend should also be capable of making secure API requests and handling responses without exposing secret credentials to visitors.
For a typical integration, developers may work with technologies such as PHP, Laravel, Node.js, Python, Java, WordPress or another backend framework. The programming language is usually less important than having a secure server-side architecture and a payment provider with suitable API documentation.
How UPI Payment Gateway Integration Works
At a high level, the process looks like this:
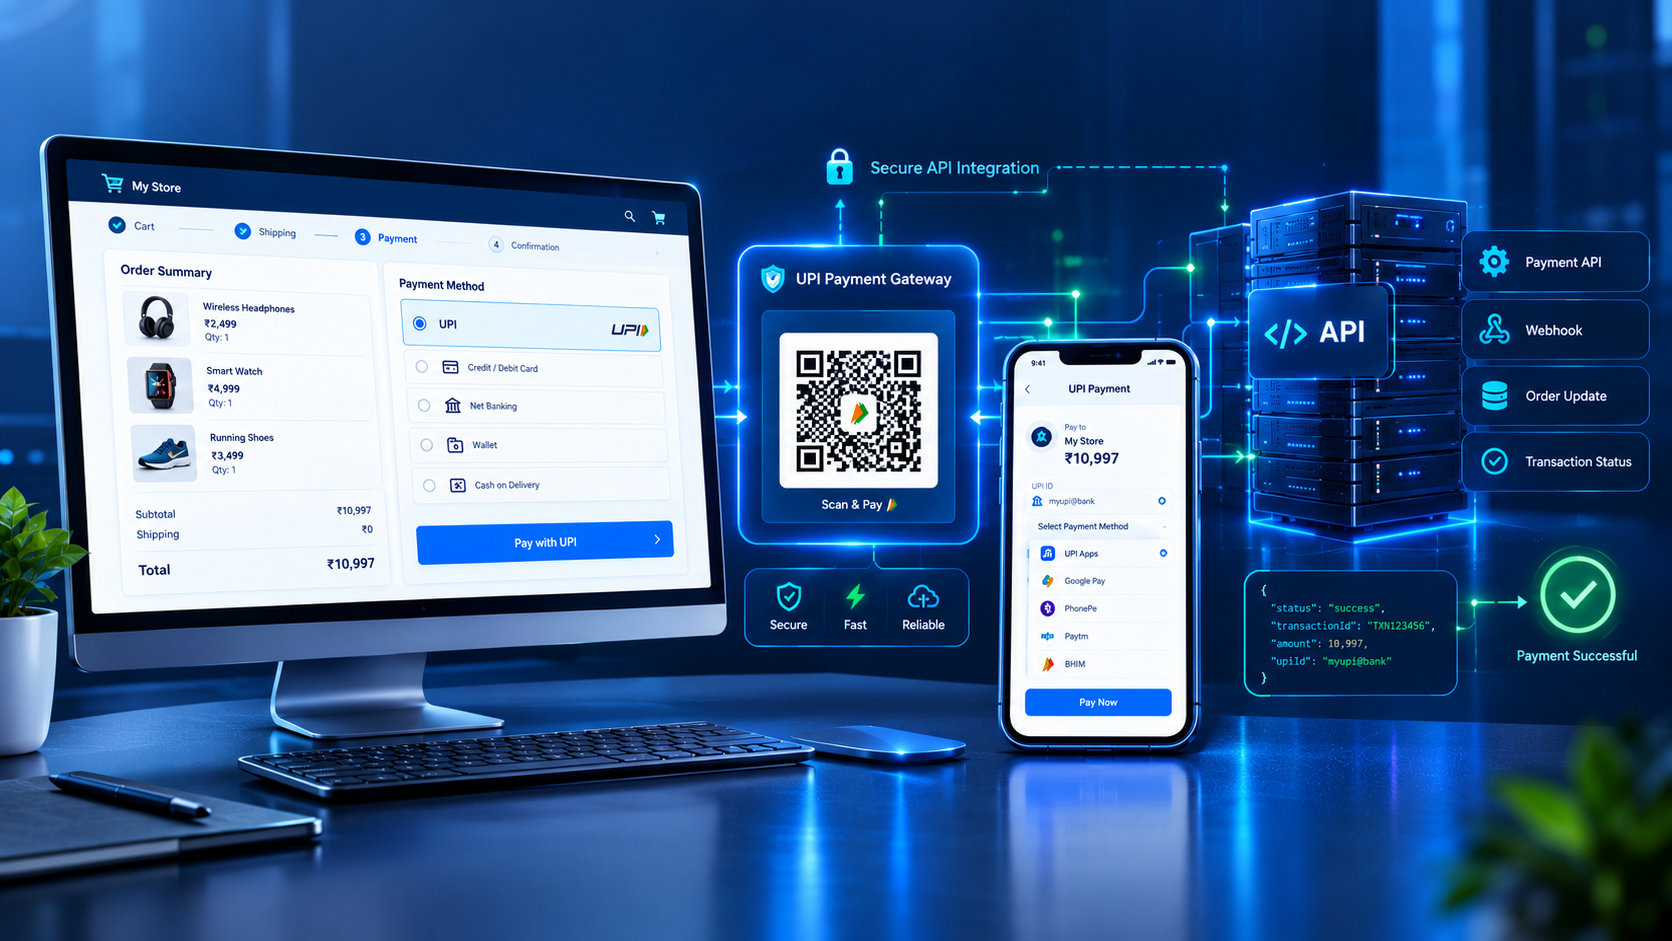
Customer → Website Checkout → Payment Gateway → UPI Payment → Verification → Website Order Update
The customer begins on your website. Your server creates a payment request containing information such as the order ID and amount. The gateway generates the appropriate payment information, which may be represented through a Dynamic UPI QR, UPI Intent or another supported flow.
After the customer completes payment, your website should not simply trust what the browser says. Instead, your backend should verify the transaction using the provider's supported mechanism, such as a status API or webhook. Once the payment is confirmed, your system can update the order status, generate an invoice, activate a service or release the purchased product.
Payment Request and Dynamic QR Generation
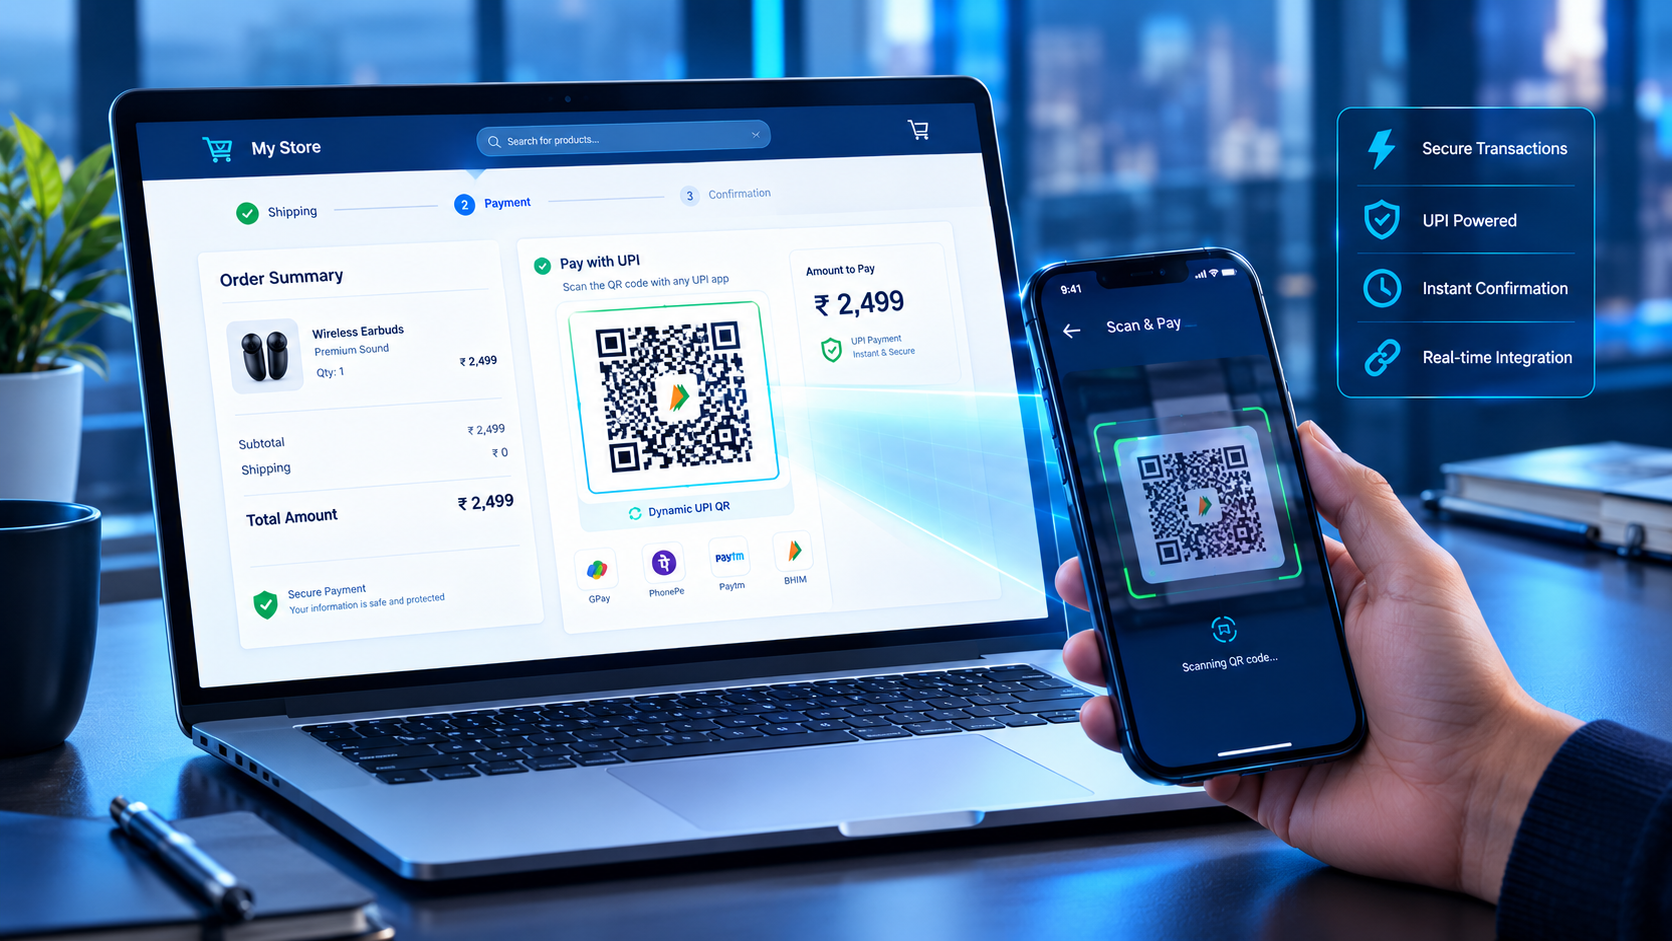
A Dynamic UPI QR can be especially useful for websites because each checkout session can contain transaction-specific information. Instead of displaying one permanent QR for every order, the payment flow can generate a QR associated with the particular payment request.
For example, suppose a customer buys a ₹1,499 subscription. Your website creates order ID SUB10291. The payment system can generate a payment request associated with that order and amount. The customer scans the QR using a compatible UPI application, reviews the payment details and completes the transaction.
NPCI's documentation describes QR-based merchant integration as a method where merchant information and the amount can be included in the QR so that the customer receives the relevant payment information when scanning it.
UPI Intent and Payment Confirmation
UPI Intent is another useful option, particularly when customers are using a mobile device. Instead of asking the user to open a UPI app manually and enter details, an intent-based flow can help initiate the payment through a supported UPI application.
However, developers should avoid making broad claims that every UPI application, bank or device will behave exactly the same way. Compatibility can depend on the implementation, operating environment and participating ecosystem. Your checkout should therefore have a sensible fallback, such as a QR option or another supported payment method.
The payment confirmation stage is even more important. Your website needs a reliable method of identifying whether the transaction succeeded, failed, remained pending or requires further verification.
Step-by-Step UPI Payment Gateway Integration
Step 1 — Choose the Right UPI Gateway
Start by deciding what your business actually needs. A small service website may only need a simple UPI payment flow, while an e-commerce platform may need dynamic payment requests, payment status APIs, webhooks, refunds, order reconciliation and developer documentation.
Look at the gateway's integration methods, onboarding process, pricing, settlement arrangement, supported APIs and technical documentation before making a decision. Don't select a provider simply because its landing page says "free". Check what is actually included in the free plan and whether additional charges apply elsewhere.
For businesses specifically searching for a UPI-focused solution, UPI-Gateway.in can be positioned around features such as Dynamic UPI QR, UPI Intent, payment APIs, payment verification and website integration.
Step 2 — Complete Merchant Onboarding
After selecting a provider, complete the merchant onboarding process. This may include business information, identity verification, bank information, website details and other compliance checks.
This is also where businesses should be careful about unsupported promises. A payment platform should not claim universal bank support, guaranteed transaction success or regulatory approval unless those statements can be officially verified.
NPCI's merchant FAQ specifically describes onboarding through an acquiring bank and mentions compliance, risk assessment and merchant configuration requirements.
Step 3 — Get API Credentials
Once your account is approved and the integration is available, you may receive API credentials such as an API key, secret, merchant identifier or other authentication values.
Never place private API credentials directly inside frontend JavaScript. Your customers should never be able to inspect the page source and obtain your secret credentials.
A common architecture looks like this:
Customer
   ↓
Website Checkout
   ↓
Your Backend
   ↓
UPI Gateway API
   ↓
Payment Request
   ↓
UPI QR / UPI Intent
   ↓
Customer Payment
   ↓
Webhook / Status API
   ↓
Your Backend
   ↓
Order Marked Paid
This separation is important because the browser is controlled by the customer, while your server is responsible for trusted transaction processing.
Step 4 — Create the Payment Order
When the customer clicks Pay Now, your backend should create an order before requesting payment.
The request may contain information such as:
-
Order ID
-
Amount
-
Customer reference
-
Return URL
-
Callback or webhook URL
-
Merchant identifier
-
Optional description
The gateway then returns payment-related information that your website can use to display the checkout.
A good system keeps your internal order ID connected with the gateway transaction ID. This makes reconciliation much easier later.
Step 5 — Add UPI QR or Intent
Your frontend can then display the payment option to the customer.
For desktop users, a QR code can be particularly convenient because they can scan it using their mobile phone. For mobile users, a supported UPI Intent button can provide a more direct experience.
A simple checkout might show:
Pay with UPI
Scan Dynamic QR
or
Pay Using UPI App
The design should be clean. You don't need a page full of technical information. Customers mainly want to know how much they need to pay, who they are paying and whether the payment was successful.
Step 6 — Verify Payment Through API or Webhook
This is probably the most important technical step.
Never treat a customer returning to your website as proof that money has been received. A redirect only tells you that the customer reached a particular URL. It does not necessarily prove the payment was successful.
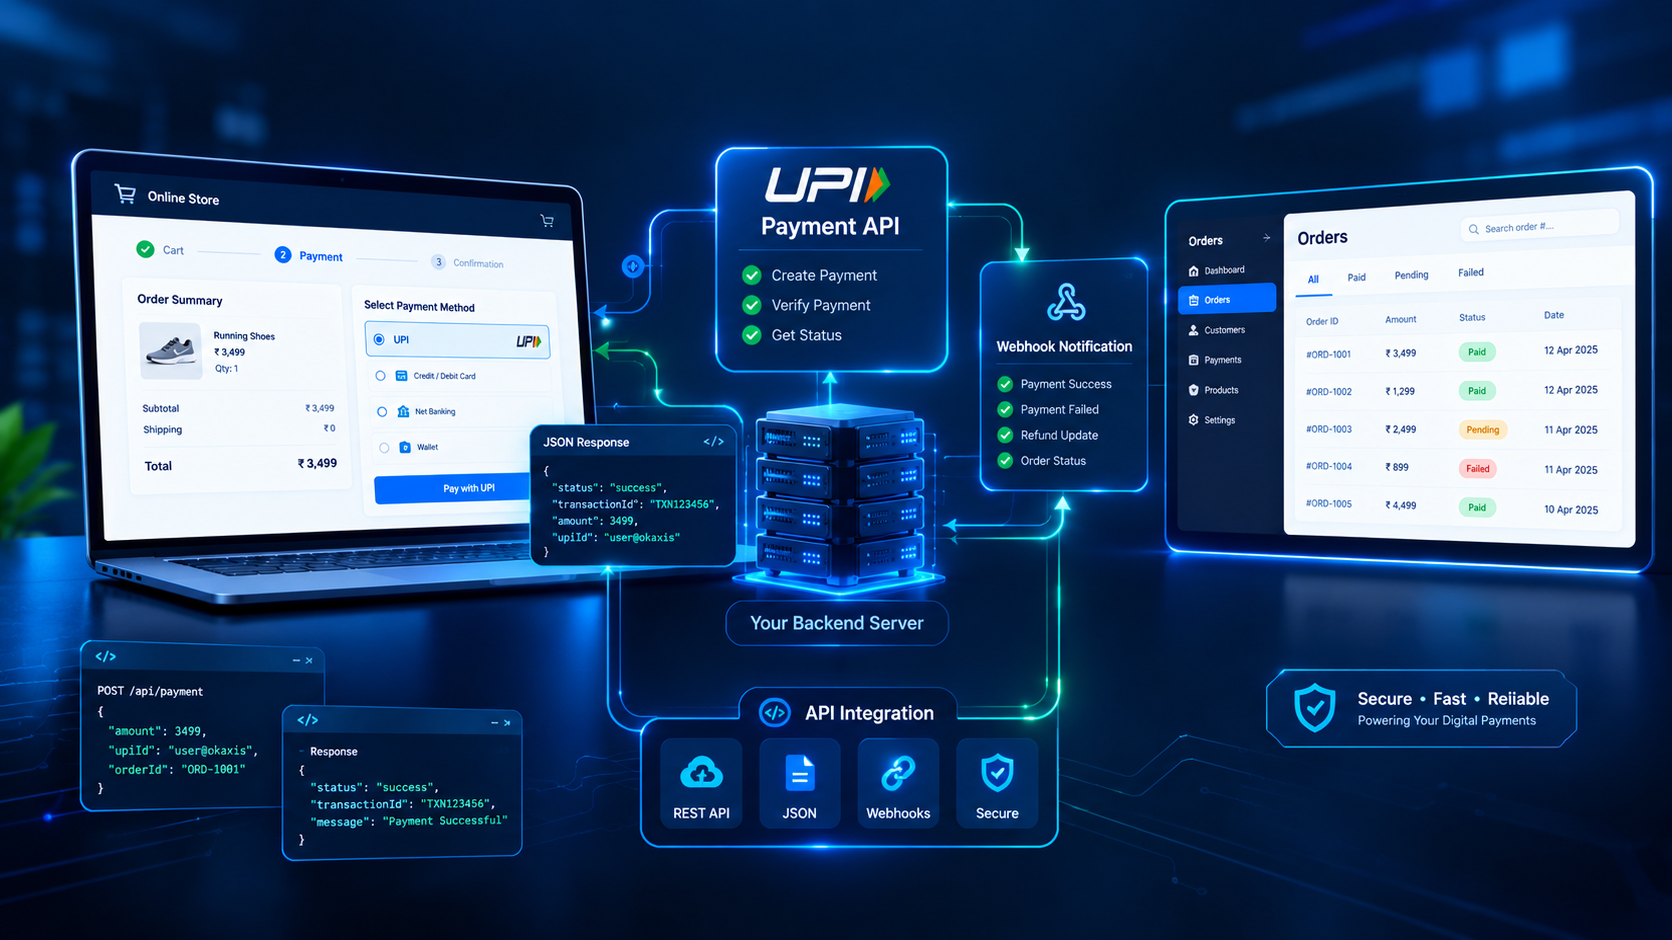
Instead, your backend should verify the transaction through the gateway's supported payment status API or webhook mechanism. Compare important fields such as transaction ID, order ID, amount and payment status before changing the order to "paid".
A webhook can be especially useful because it allows the payment system to notify your server when a transaction status changes.
For example:
Payment Created
      ↓
Customer Pays
      ↓
Gateway Processes Status
      ↓
Webhook Sent
      ↓
Backend Validates Data
      ↓
Order Updated
      ↓
Customer Receives Confirmation
This automation removes the need for manually checking screenshots or bank notifications for every order.
UPI Gateway Integration for E-commerce Websites
For an e-commerce website, UPI integration should be connected directly to the cart and order system. When the customer selects UPI, the website should create a unique payment request for the exact order amount.
Consider an example where a customer purchases three products for ₹2,750. Your system creates an order and sends the payment request to the gateway. The customer completes the UPI transaction. Once your backend verifies the successful transaction, the order can automatically move from Payment Pending to Payment Confirmed.
This is much cleaner than asking customers to send payment screenshots through WhatsApp and waiting for someone to verify them manually.
The same concept can work for digital products, online courses, subscriptions, service bookings and other legitimate online businesses. The key is that payment verification should remain connected to the actual order rather than depending on customer-provided proof.
UPI Gateway Integration for Shopify and Custom Websites
Shopify and other hosted platforms can require a different integration approach from a completely custom website. A custom website gives your development team greater control over backend APIs, database logic, checkout pages and webhooks.
With Shopify, the available integration depends on the payment provider and Shopify's current payment architecture. Therefore, businesses should verify whether their selected UPI provider offers an official Shopify-compatible integration rather than assuming any API can simply be inserted into checkout.
For WordPress or WooCommerce websites, integration may be possible through an existing plugin, custom development or an API-based connection, depending on the gateway. The best approach is always the one that maintains secure server-side payment verification and a clear order-status workflow.
Common UPI Integration Mistakes to Avoid
One of the most common mistakes is treating a QR code as the complete payment integration. A QR can initiate a payment, but an online store still needs a reliable method to identify and verify that particular transaction.
Another mistake is marking an order as successful immediately after a redirect. This can create serious reconciliation problems if a customer reaches the return page while the transaction is actually pending or unsuccessful.
Other problems include exposing API secrets in frontend code, failing to validate payment amounts, using the same transaction reference for multiple orders, not handling pending payments and ignoring webhook retries.
A strong integration should be designed around the assumption that payments can be delayed, duplicated, interrupted or returned with unexpected statuses. Your system needs to handle those situations gracefully rather than assuming every transaction follows the perfect path.
Free UPI Gateway: Is It Really Free?
The phrase Free UPI Gateway attracts attention, but businesses should understand what "free" means before choosing a provider.
A platform may offer free onboarding, a free integration plan or zero percentage-based platform fees while other costs can still exist depending on the payment arrangement, banking partner, services used or merchant plan. Pricing structures can change, so always check the provider's current pricing page and terms.
For a website owner, the better question is not simply "Is it free?" It is:
What will I actually pay for my expected transaction volume and required features?
Look at onboarding charges, monthly charges, transaction fees, settlement conditions, API availability, webhook access, support and additional services.
How Much Does UPI Payment Integration Cost?
The cost of integrating a UPI Payment Gateway depends on the architecture and the provider.
For a simple website, the technical integration may be relatively straightforward. A larger e-commerce website can require more work because it may need custom checkout logic, order management, payment reconciliation, refunds, webhooks, reporting and failure handling.
The total cost can therefore include both payment-provider charges and development costs.
| Integration Type | Typical Requirement | Development Complexity |
|---|---|---|
| Basic UPI QR | QR-based payment collection | Low |
| Dynamic UPI QR | Order-specific QR payments | Low to Medium |
| UPI Intent | Mobile-focused payment flow | Medium |
| Payment API | Custom backend integration | Medium |
| API + Webhooks | Automated verification | Medium to High |
| E-commerce Integration | Checkout + order automation | High |
| Custom Payment Platform | Complete payment workflow | High |
These are technical complexity categories, not fixed market prices. Your actual cost should be confirmed with the selected provider and developer.
Security and Payment Verification Best Practices
Security should be part of the integration from the first line of code, not something added after the website is already live.
Use HTTPS throughout the checkout process. Keep private credentials on the server. Validate every payment response on the backend. Store transaction references carefully and prevent duplicate order processing.
You should also maintain proper logs for payment attempts, successful transactions, failed transactions and webhook events. This becomes extremely valuable when a customer says, "I paid, but my order still shows pending."
A professional payment system should be able to answer basic questions such as:
Which order was this payment for?
What amount was requested?
What amount was actually confirmed?
What is the gateway transaction ID?
When did the payment status change?
Was the webhook received?
Was the order updated successfully?
These records turn payment troubleshooting from guesswork into a structured process.
UPI Gateway vs Traditional Payment Gateway
A traditional payment gateway may provide multiple payment methods such as cards, net banking, wallets and UPI. A UPI-focused gateway, on the other hand, can be designed primarily around UPI payment collection and automation.
Neither model is automatically better for every business.
| Feature | UPI-Focused Gateway | Multi-Method Payment Gateway |
|---|---|---|
| UPI QR | Usually central | Usually supported |
| UPI Intent | Core use case | May be supported |
| Cards | Depends on provider | Commonly supported |
| Net Banking | Depends on provider | Commonly supported |
| UPI APIs | Core feature | Often available |
| Integration Focus | UPI payments | Multiple payment methods |
| Best For | UPI-first businesses | Businesses needing many payment options |
The right choice depends on your customers and business model. If most of your customers prefer UPI, a focused solution can provide a simpler technical and commercial setup. If you need cards, wallets and multiple international payment methods, a broader gateway may make more sense.
Why Choose UPI-Gateway.in for Website Integration
The goal of UPI-Gateway.in is to provide a UPI-focused payment collection and automation solution for businesses that want to accept payments through their websites or applications.
The platform can be positioned around capabilities such as Dynamic UPI QR, UPI Intent, payment status APIs, webhooks, developer-friendly APIs and automated payment verification. Instead of treating payment collection as simply displaying a static QR, the focus is on connecting payment activity with the merchant's digital workflow.
For a business owner, that can mean a more automated process:
Create Payment → Show QR/Intent → Customer Pays → Verify Payment → Update Order
The exact availability of each feature depends on the merchant's setup and the applicable provider or banking arrangements. Businesses should always review current documentation and terms before going live.
The bigger idea is simple: your website should know when a payment has actually been verified, rather than relying on screenshots, manual messages or guesswork.
Best Practices for a Smooth UPI Checkout
A good UPI checkout doesn't need to be complicated. In fact, simpler is often better.
Show the order amount clearly. Give customers an obvious UPI payment option. Use a dynamic QR when your use case requires order-specific payment information. On supported mobile flows, provide UPI Intent. Give customers clear feedback when a transaction is processing.
Most importantly, don't confuse payment initiation with payment confirmation.
A customer clicking "Pay" means the payment process started. It does not automatically mean that your business received a successful payment. Your backend should confirm the transaction through the appropriate payment-status mechanism before delivering a paid service or product.
This small distinction can save a business from a surprising number of payment disputes.
Why Payment Automation Is Better Than Manual Verification
Think about a business receiving 20 UPI payments a day. Manually checking every transaction may still be manageable. Now imagine receiving 500 or 5,000 payments.
The problem quickly becomes obvious.
Manual verification creates delays, increases human error and makes it harder to reconcile orders. Automated verification allows your website to connect payment events with the correct order and update the customer journey without someone sitting behind a screen checking screenshots all day.
This is where APIs and webhooks become more than technical features. They become business automation tools.
A UPI Payment API can help your application create or check payment transactions programmatically, while a webhook can notify your backend when an event occurs. Together, they can create a payment workflow that operates in the background while your team focuses on customers and business growth.
UPI Payment Integration: A Practical Example
Let's take a simple example.
Suppose an online software company sells a monthly plan for ₹999. A customer chooses the plan and clicks Pay with UPI.
The website creates order ORD78452. Its backend sends the amount and order information to the payment system. The system generates the appropriate payment details, and the website displays a Dynamic QR or supported UPI payment option.
The customer completes the transaction through a UPI application.
Now comes the important part. The website receives a status update or checks the transaction through the appropriate API. The backend validates the transaction and confirms that it belongs to ORD78452 and that the payment status is successful.
Only after that does the system activate the customer's subscription.
That is what a proper UPI Gateway for Website should help you achieve: not just payment collection, but a connected payment-to-business workflow.
Things to Check Before Going Live
Before launching your UPI integration, test more than just a successful payment. A real website needs to handle the less exciting scenarios too.
Test successful transactions, failed payments, pending payments, duplicate callbacks, browser refreshes, abandoned checkout sessions and delayed status updates. Check whether the correct order receives the payment confirmation.
Also verify that your website's privacy policy, terms, refund policy and customer support information are clearly available where required by your business and payment arrangements.
The payment page is one of the most sensitive parts of an online business. A clean interface builds trust, but reliable backend handling is what keeps the system working when something doesn't go according to plan.
Conclusion
Integrating a UPI Payment Gateway in a website is not simply a matter of putting a UPI QR code on a checkout page. A professional integration connects your website, payment request, UPI QR or Intent flow, payment-status API and backend order system into one workflow.
The process usually starts with choosing a suitable provider and completing merchant onboarding. From there, developers can create payment orders through APIs, display Dynamic UPI QR or supported UPI Intent options, receive payment updates and verify transactions before marking an order as paid.
For Indian businesses, the opportunity is significant because UPI continues to operate at enormous scale. NPCI's latest published statistics show more than 24.5 billion UPI transactions in August 2026, illustrating why UPI remains an important payment option for online businesses.
If you are building a website and want a UPI Gateway for Website, focus on three things first: easy customer checkout, reliable payment verification and secure backend integration. Features such as Dynamic UPI QR, UPI Intent, APIs and webhooks can then be used to create the experience your business actually needs.
For businesses exploring a UPI-focused integration, UPI-Gateway.in can be considered as a platform focused on UPI payment collection and automation. Before implementing any payment solution, review the provider's current features, pricing, onboarding requirements and applicable terms so your integration matches your business and regulatory requirements.
Frequently Asked Questions
1. How do I integrate a UPI Payment Gateway into my website?
First, choose a suitable UPI payment provider and complete merchant onboarding. After receiving the required credentials, your developer can connect the provider's API with your website backend, create payment orders and display Dynamic UPI QR or supported UPI Intent options. Payment status should then be verified through the provider's API or webhook before your website marks the order as paid.
2. Can I use a UPI Payment Gateway on a custom website?
Yes. A custom website can generally integrate a UPI payment solution through APIs, provided the selected provider supports the required integration. Your development team can connect the payment request, checkout interface, transaction status and order-management system. The exact API and onboarding process depends on the provider.
3. What is a Dynamic UPI QR?
A Dynamic UPI QR is a QR generated for a particular payment request rather than relying only on a permanent static QR. It can contain transaction-specific payment information, such as the merchant details and amount, depending on the implementation. This makes it useful for e-commerce checkouts and automated payment workflows.
4. Is a Free UPI Gateway really free?
It depends on what the provider means by "free". Some providers may offer free onboarding, free integration or a plan with no percentage-based platform fee, while other charges may apply depending on the service and payment arrangement. Always check the current pricing, terms and settlement conditions before choosing a provider.
5. Why is payment verification important in UPI integration?
Payment verification ensures that your website does not mark an order as paid simply because a customer reached a success page. A proper integration verifies the transaction through the supported payment-status API or webhook mechanism and checks relevant transaction information before fulfilling the order. This helps reduce incorrect order updates and manual payment disputes.
Ready to connect UPI to your checkout?
JaduPe provides current service, eligibility and plan details. Review them before you begin.
Explore JaduPe ↗Related articles.

Free UPI Gateway: How Businesses Can Accept UPI Payments at Low Cost
Looking for a free UPI Gateway to accept online payments without expensive transaction charges? Discover how businesses can use Dynamic UPI QR Codes, UPI Intent, Merchant UPI IDs and payment APIs to simplify UPI payment collection and automate payment verification at a lower cost.
Read article →
UPI Gateway: Complete Guide for Businesses in 2026
Learn what a UPI Gateway is, how it works, and explore Dynamic QR, UPI Intent, payment APIs, automated verification and integration for online businesses.
Read article →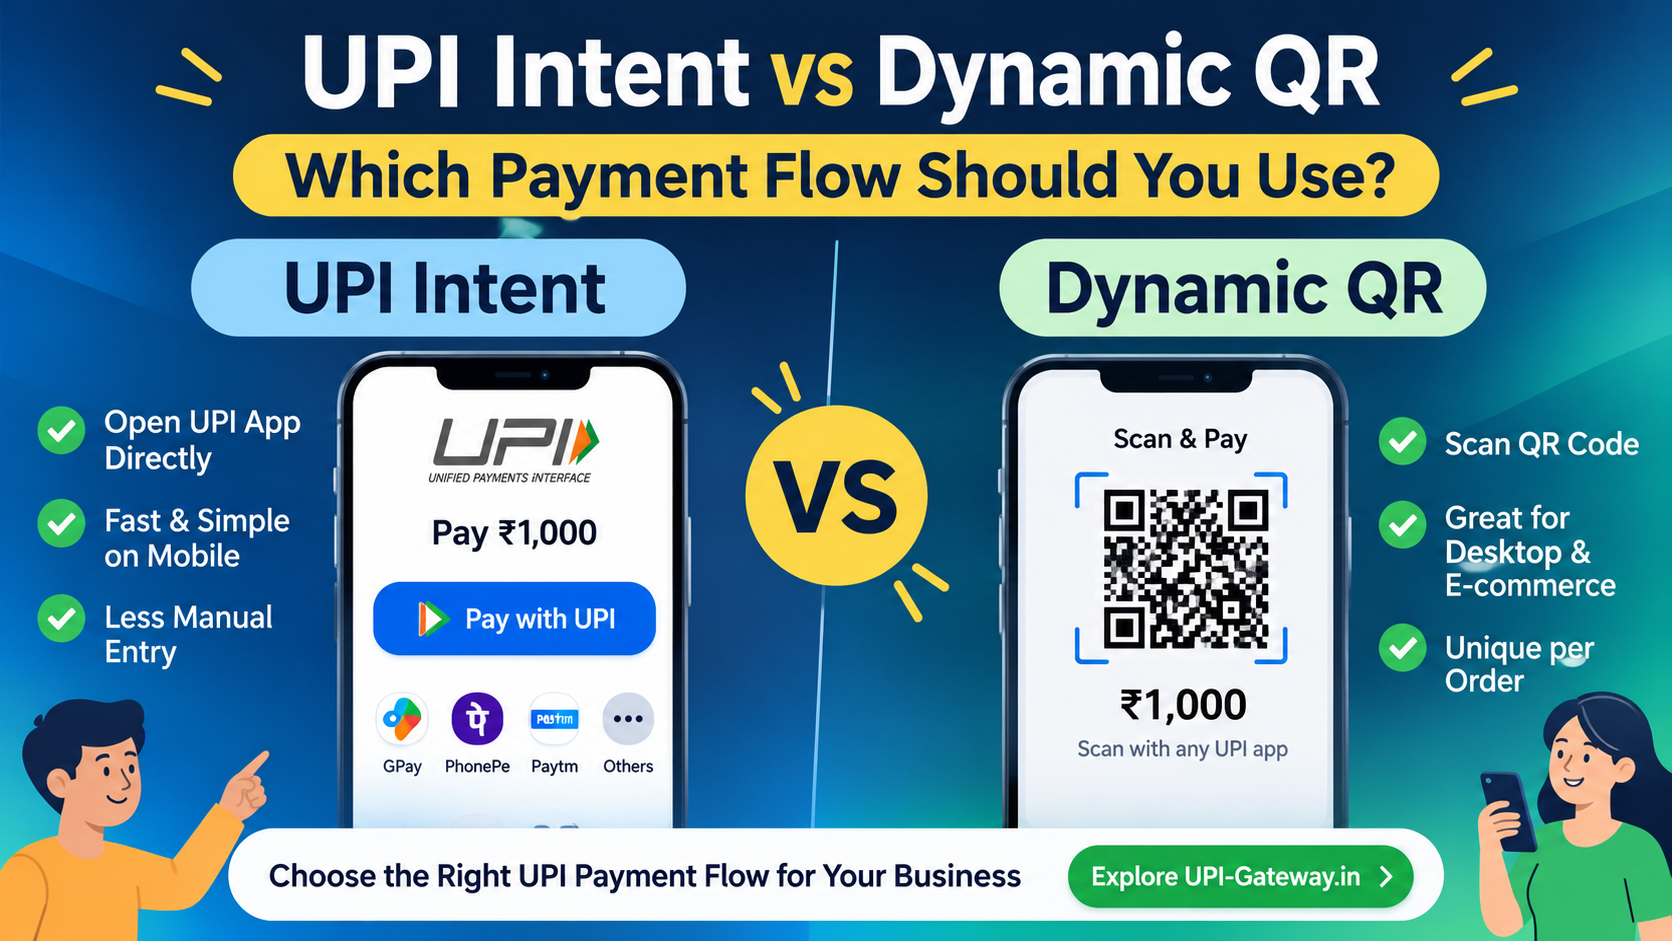
UPI Intent vs Dynamic QR – Choose the Right Payment Flow
Should your business use UPI Intent or Dynamic QR? Understand the differences, benefits and payment integration options for online businesses.
Read article →